
Read the measurement, not the size of the photograph
To judge earring dimensions online, compare three things: the full height, the widest front-facing point, and the distance from the attachment point to the bottom. Put those measurements into the same units, then draw a life-size outline. A photograph helps you understand the design, but its size on your screen is not the size of the earring.
This distinction matters with statement pieces. A narrow pair can be long without occupying much horizontal space, while a shorter circular design can cover a much wider area. Descriptions such as large, petite, or dramatic do not provide a shared measuring standard. Two listings using the same adjective may describe very different objects.
Start with a millimeter ruler, plain paper, a pencil, and an earring you already own. You are making a physical comparison, not choosing a flattering shape or predicting how comfortable a new pair will feel. Keep those separate decisions for later.
Give each number a starting point
Total height runs from the highest part of the earring to its lowest part in the stated orientation. Drop may instead mean the distance from the piercing or other attachment point to the bottom. Some sellers use these terms differently, so record the endpoints rather than relying on the label alone.
Imagine an invented earring measuring 54 millimeters from top to bottom, with its post positioned 9 millimeters below the top. Its attachment-to-bottom distance would be 45 millimeters in that position: 54 minus 9. Another earring with a stated 54-millimeter drop could hang farther below its attachment, despite the matching number. This example is arithmetic, not a measurement of an RJC product.
Width usually means the largest side-to-side span viewed from the front. It is not post length, thickness, or the gap inside a hoop. For an irregular shape, ask whether the measurement covers the complete silhouette, including a projecting leaf or side accent. Compare complete objects with complete objects, not a centerpiece measurement with another pair's overall width.
Make a two-column scale worksheet
Lay your reference earring flat in its natural resting position. Do not pull articulated parts taut or move them into an arrangement they would not normally take. Align the ruler's zero mark with the chosen endpoint; the physical end of a ruler may extend beyond zero.
| Field | Your reference | Candidate listing |
|---|---|---|
| Overall height | 40 mm, measured | 54 mm, seller-stated |
| Maximum front width | 18 mm, measured | 12 mm, seller-stated |
| Attachment below top | 5 mm, measured | 9 mm, seller-stated |
| Attachment-to-bottom | 35 mm, calculated | 45 mm, calculated |
| Depth and movement | Observed on your pair | Side view still needed |
The candidate in this exercise hangs 10 millimeters farther below its attachment, not 14. It is also 6 millimeters narrower. Those two differences explain more than saying it is bigger. Labeling the origin of each value prevents an estimate from quietly becoming a specification.
When converting units, one inch equals 25.4 millimeters. A two-inch listing therefore equals 50.8 millimeters; 3 centimeters equals 30 millimeters. Keep the original stated value beside the conversion. Extra decimal places do not make a seller's approximate measurement more precise.
Draw the space the earring occupies
Draw a rectangle matching the candidate's overall height and width. Inside it, sketch the outline loosely and mark the attachment point. Repeat for your reference on the same sheet. You do not need artistic accuracy: the surrounding rectangles show the occupied space, and the attachment marks show where the pieces would begin hanging.
For a tapering design, shade only the approximate silhouette rather than filling the entire rectangle. This makes clear why a 54-by-12-millimeter line and a 54-by-30-millimeter fan can look substantially different. The rectangle is a boundary, not a statement that every part of that area contains jewelry.
Hold the paper beside, not attached to, your ear and compare it in a mirror. Keep scissors, pins, and the ruler away from the eye area. A paper outline can help you picture the front-view span; it cannot reproduce thickness, weight, movement, or the actual position created by a particular fastening.
Use product photos for the questions numbers cannot answer

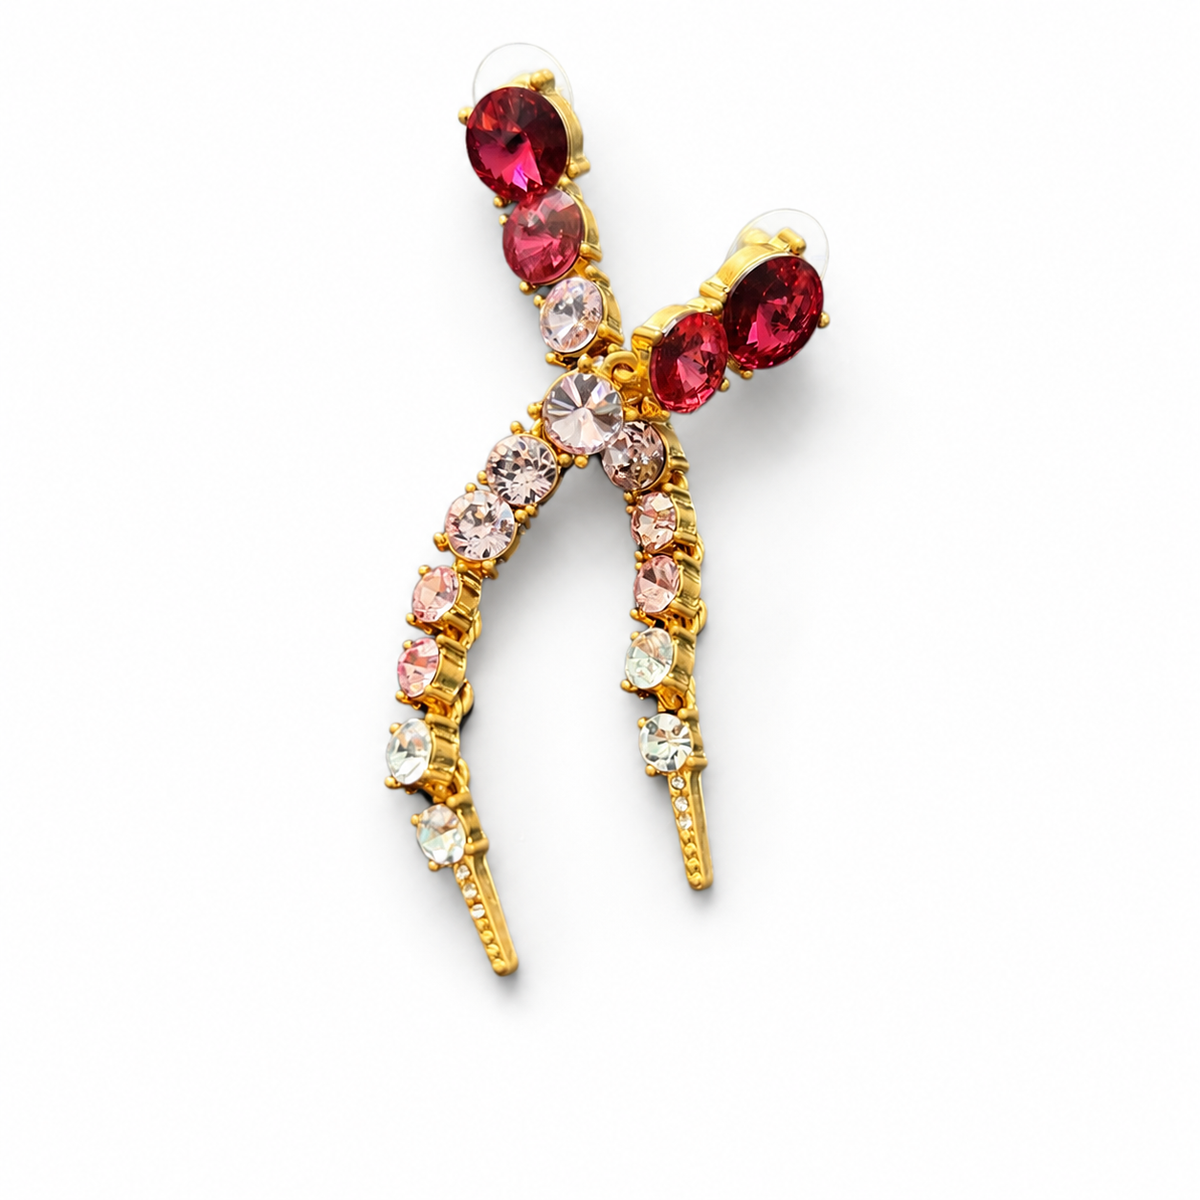
The pictured RJC listing describes graduated round crystal-style accents and stud posts. It provides a useful example of a length-led shape, but the reviewed description does not supply exact length and width. Do not borrow the worksheet's example numbers for this pair. Use its images to locate the widest point and distinguish the decorative front from the fastening.
A front view describes outline; a side view explains projection; a back view locates the attachment. A worn photograph adds context, but an unfamiliar model's ear is not a calibrated ruler. Even a ruler photograph becomes less reliable if the ruler and earring sit at different distances from the camera. Look for the item laid beside the scale on the same plane.
Finish with a comparison you can actually use
Before choosing from the earrings collection, summarize the candidate in one sentence: “Compared with my reference, this is longer below the attachment, narrower across the front, and still needs a side-view check.” That is a clearer decision record than “looks about right.”
If one missing measurement changes your decision, request that specific dimension, naming its endpoints and your selected option. If the dimensions already answer your question, stop measuring; there is no need to manufacture uncertainty. You can then turn to the Journal's styling guides for a separate decision about how to wear the shape you have chosen.